Here’s a quick and easy way to breathe new life into your haunted house or dark ride on the cheap, and give your mask-wearing props a whole new level of realism.
Most masks lack eyes, and when they do have them they are obviously fake, forcing away the viewers suspension of disbelief. A very simple way to solve this is to give your mask prop more realistic eyes. In this short tutorial I’ll show you how to achieve this simple effect that really gives you a bang for your buck.
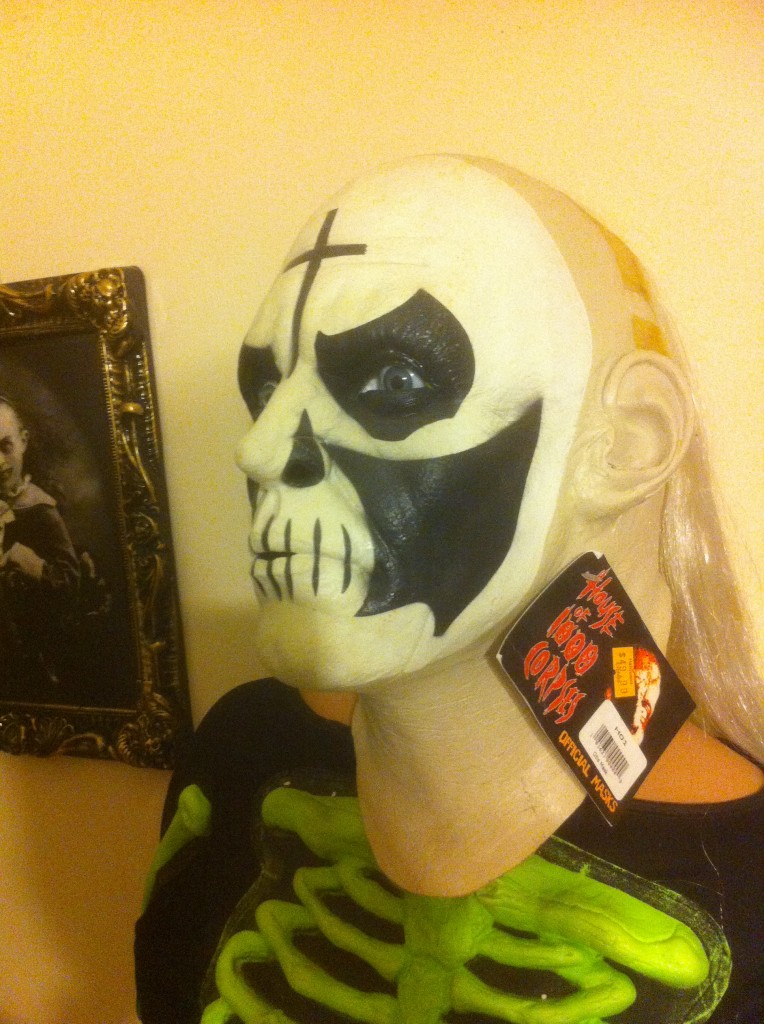
For this how-to I’m using a pretty sweet Otis mask from House of 1000 Corpses that I picked up a few years ago. It’s fairly realistic already and will really show what I’m talking about.
Materials Required

- Styrofoam Head Available at beauty supply stores. I’ve also had good luck at thrift stores like Savers. You can also buy a dozen in bulk on Amazon with a pretty decent discount (About $3.33 each)
- Fake Half Eyes I usually buy these in bulk on eBay
- Screws Whatever you have lying around will be fine
- Hot Glue Gun + Sticks Crazy or gorilla glue also work, but hot glue is easiest to work with
The Process
Once you’ve gathered up your materials you simply shoot a little hot glue into the inside of the half eye, place the screw head into it, and then shoot some more glue over it, sealing the head of the screw in. In the past I have also used super glue, but hot glue is plenty strong enough for our purposes, sets much faster and is generally just easier to work with.

I also didn’t specify any specific type of screws, because as long as they have a flat head they’ll work fine. I usually just grab whatever is lying around.
Once the eyes have been glued let them sit for a few minutes to harden. I let them sit about 5 minutes or so, but I’m really impatient, so you may want to wait a bit longer just to make sure the glue is solid.

Once the glue has dried, take your eyes and screw them into the Styrofoam head. Leave them out about an inch or so, and pull the mask over the head. You may have to use a bit of trial and error to get the eyes to sit at the correct location, so if they don’t look right adjust where they are screwed into the head, and how deeply they are embedded.
The Result

From the before and after pictures you can really see what I mean when I say it adds a level of depth and realism to your creations.
I’d love to see how you utilize this tip with your own props, so drop me a comment and link me to your work!


Do you want to sell that mask